
This page allows you to configure payment gateways, enable specific payment methods, and manage additional payment-related settings.
Below are the steps to set up the Payment Settings page.
Payment-Gateway Setting:
In this section, you can configure your integrated payment gateways. Only payment gateways that are partnered or mapped with us can be configured.
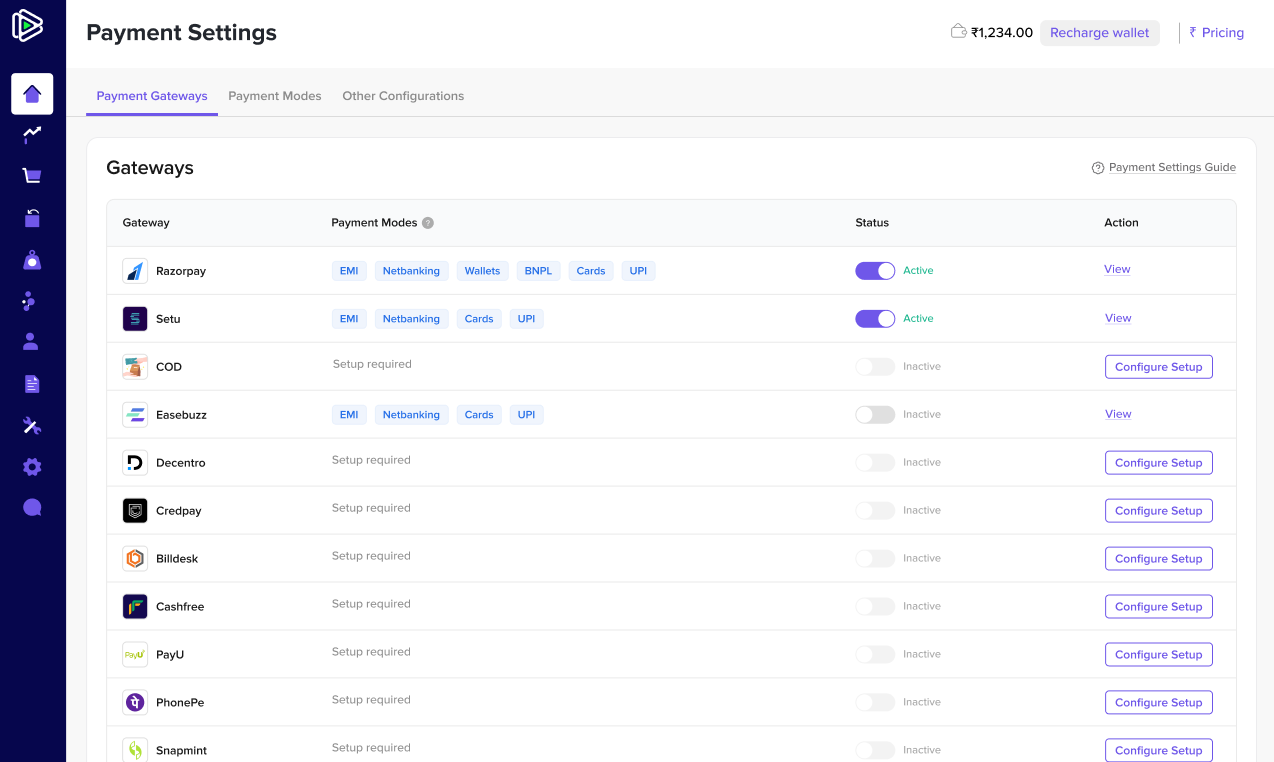
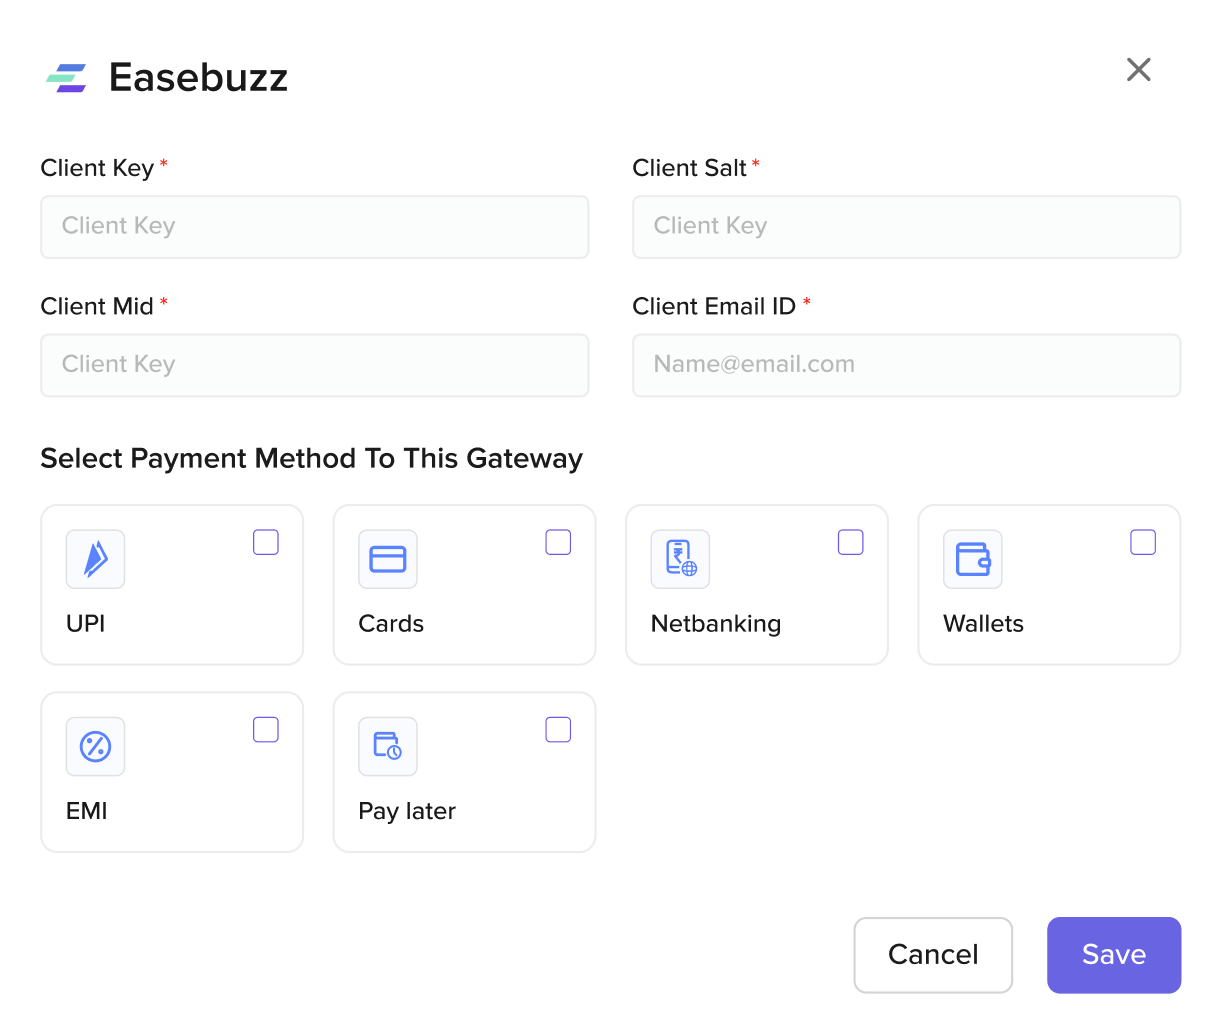
Configure: Clicking Configure opens a form where you need to enter the required credentials for the payment gateway to function correctly on your checkout page. You can also select the payment methods you want to display to customers on the checkout.
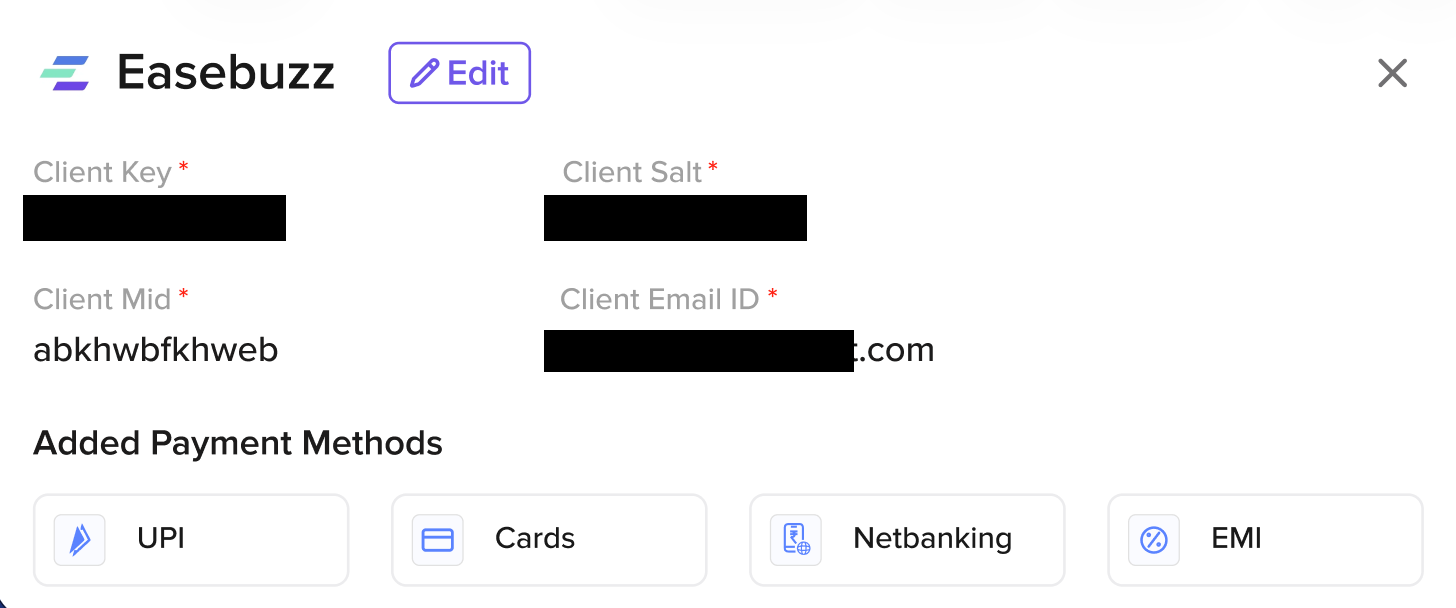
View: The 'View' option lets you review the saved credentials and the payment methods that have been activated for that gateway.
Once the configuration is saved successfully, the payment gateway will show an active toggle on the Payment Gateway Settings page.
Payment Modes:
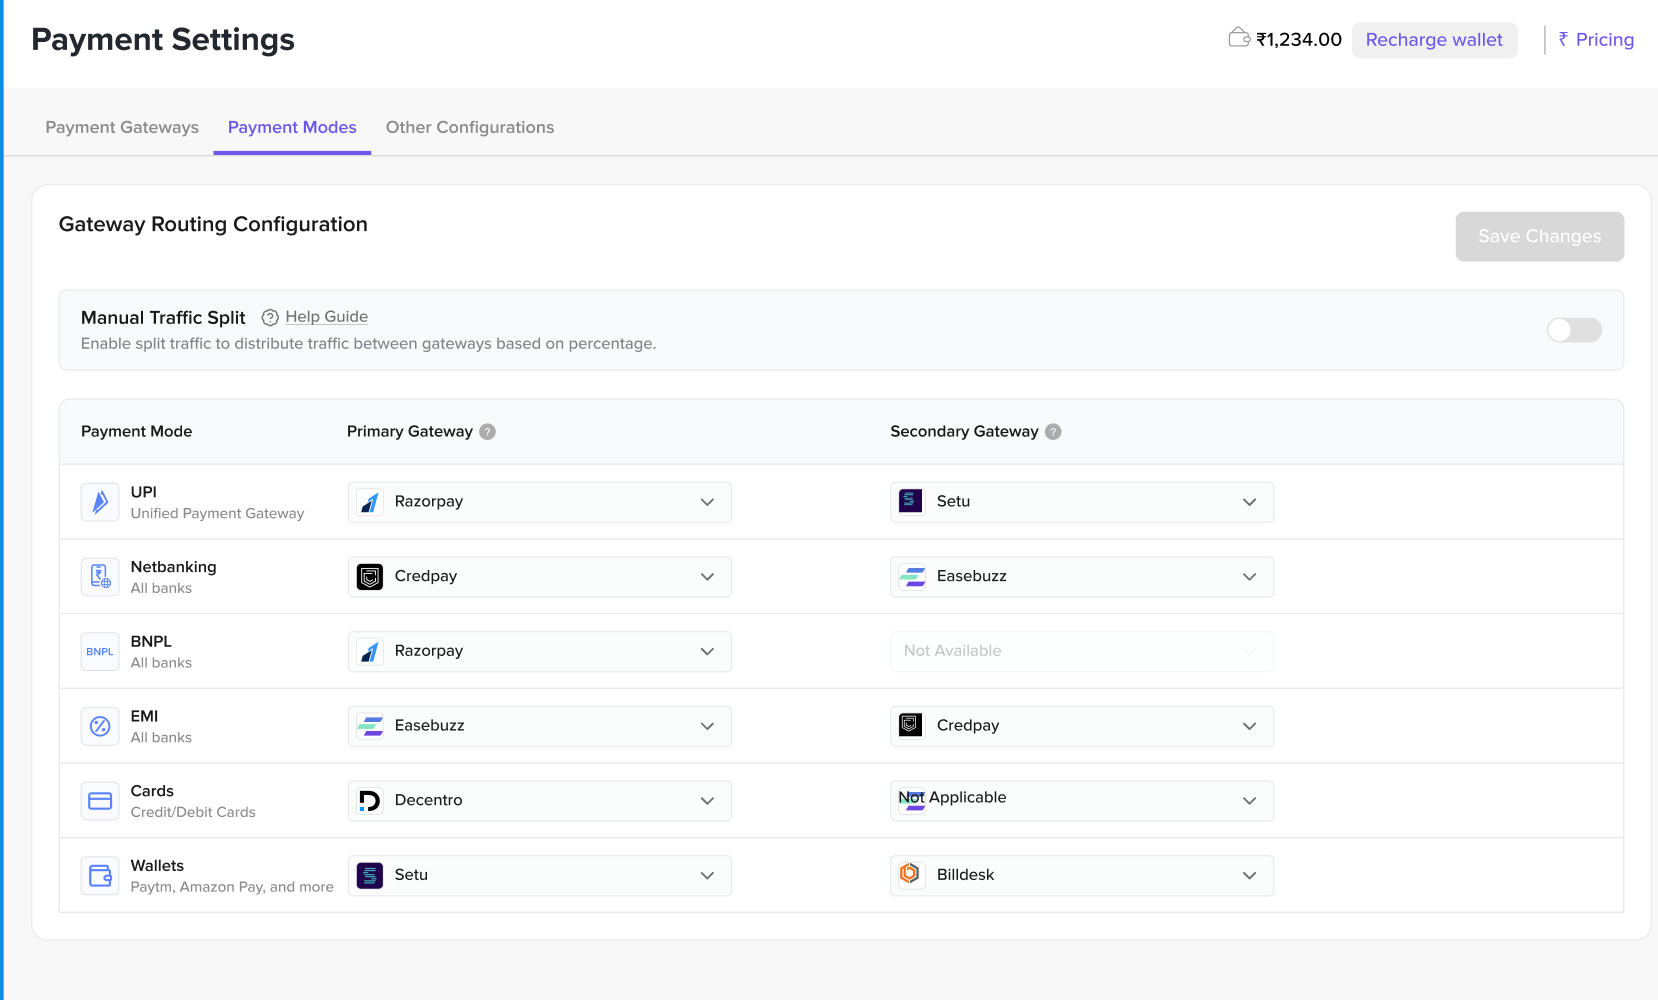
If you have multiple payment gateways and want to assign different gateways to different payment methods, you can configure that here.
For each payment method you have activated in Payment Gateway Settings, click the corresponding dropdown and select the Primary Gateway and Secondary Gateway.
UPI Priority:
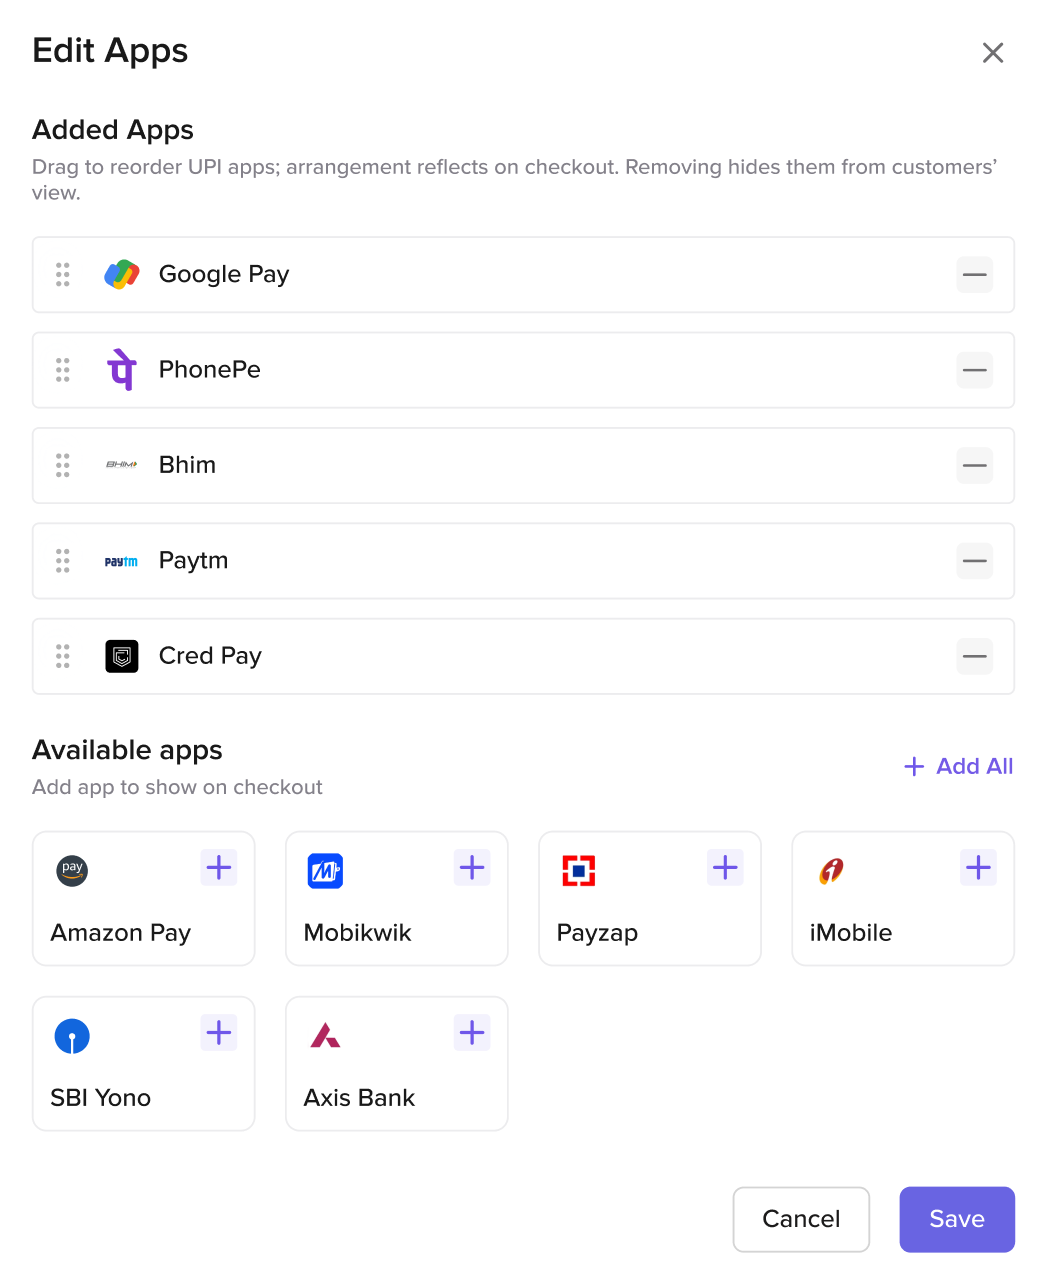
This section allows you to manage the UPI apps displayed on the checkout page (especially for mobile web). You can choose which UPI apps to show and set their priority order.
->Drag and drop the apps in the Added Apps section to rearrange their display order. The sequence set here will be reflected on the customer’s checkout page.
->Removing an app from the Added Apps list will hide it from customers’ view.
->From the Available Apps section, you can add more UPI apps to be shown on checkout.
Manual Traffic Split:
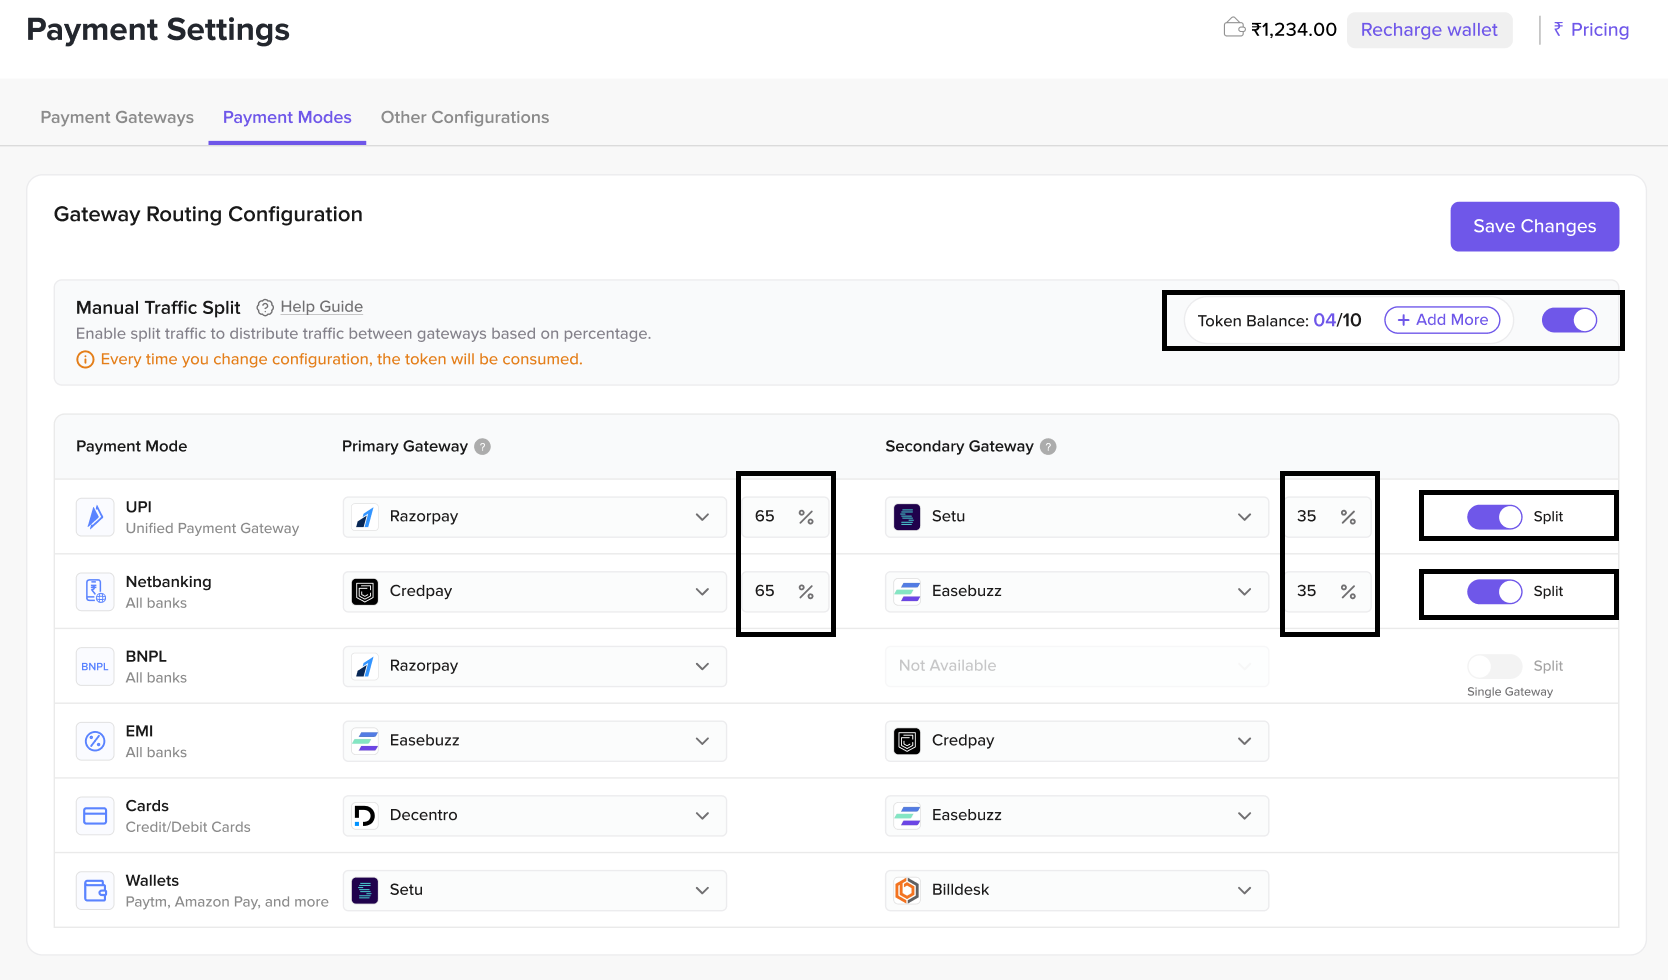
This feature allows you to split traffic between the primary and secondary gateways for a specific payment method (the sum of both percentages must equal 100%). To use it:
->Enable the Manual Traffic Split toggle.
->Enter the desired percentage split in the provided fields.
You can enable or disable manual traffic split per payment method. For example, if you have enabled it for both UPI and Cards but don’t want it for Cards, simply turn off the toggle for Cards. Note: Every time you save a new configuration, one token will be consumed.
Other Configurations:
This section allows you to configure additional checkout and display settings to enhance the customer payment experience.
Checkout & Display Settings
1. Last Paid Payment Method:
Enable this toggle to automatically pre-select the customer’s last used payment method at checkout.
2. PAD (Pay After Delivery) Widget On PDP:
Enable this option to display the Pay After Delivery widget on Product Detail Pages (PDP). This helps inform customers about the Pay After Delivery payment option. Once you activate the toggle, you need to add the PAD creds(if PAD not configured)
3. Other Payment Mode:
Enable this toggle to allow customers to access additional payment methods that redirect to your Shopify store or other external payment gateways.
4. Payment Method Button Label:
Customise the label for the payment method button. Enter your preferred text in the field and click Add.
6. Number of Payment Methods Display Count
Set the maximum number of payment methods to display at checkout for customers.
(Default: 5)
7.COD on top:
This will help you to add the COD option on the top of other payment methods, without any change in the ‘checkout builder’
To save your changes, click the Save Changes button at the top right.